
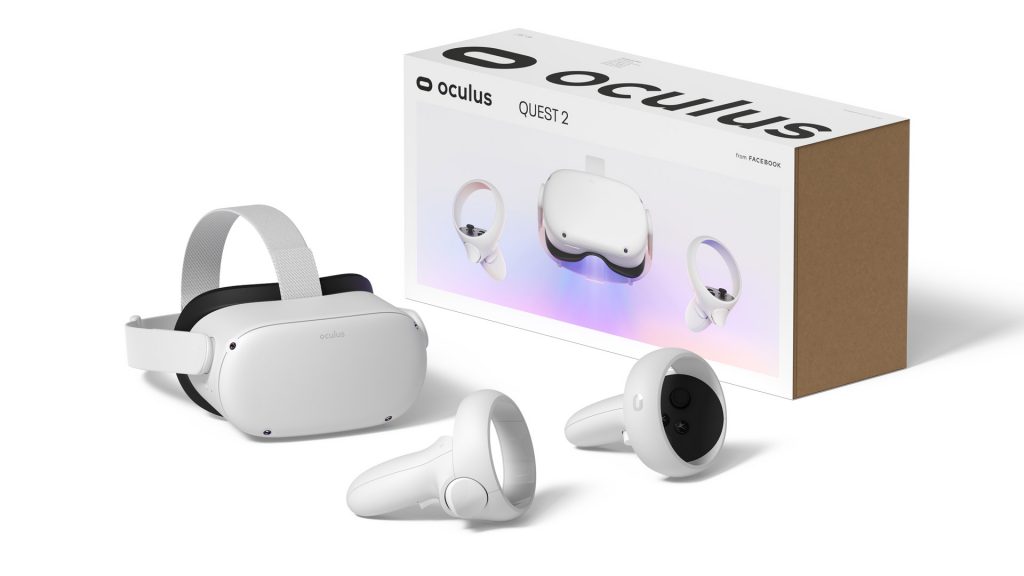
The Oculus Quest 2 is fresh onto the market, and a whole host of people have the chance to jump into the world of VR. If you find yourself upgrading your headset or this is your first foray into VR, you might be looking for some tips to help get started. We’ve got you covered with just a few of our top Oculus Quest 2 tips and tricks right here.
Admittedly, we’re still exploring the Quest 2 ourselves, so we may not have all of the best practices nailed down. We’ll share our early experiences with you and be sure to update these tips as we learn more.
Table of Contents
Best Oculus Quest 2 tips and tricks
Enable that 90Hz refresh rate

Although the Quest 2 features a smooth 90Hz refresh rate, it ships programmed to 72Hz straight from the box. Apparently, the 90Hz refresh rate will eventually become the box standard, but Oculus hasn’t really offered a timeline of when that will be. If you’re a true aficionado, you’ll probably want to jack up that refresh rate right away.
Luckily, this is pretty easy to do – almost like Oculus knows that most people will want to make the switch. Just press the Oculus button on your controller to bring up the Quest menu and select the Experimental Features option from the side. Scroll down until you find the 90Hz refresh rate and toggle the option to on, it’s really that simple.
Navigate with voice commands
You can get around the Oculus Quest 2 voice menus a couple of different ways. Of course, the controllers are an obvious place to start, but voice commands are easier and often a bit faster. Instead of relying on buttons to navigate, you can instruct your headset to launch games like Beat Saber or open settings menus in seconds.
If you want to activate voice commands, simply open the Quest menu and head to the Quick Actions tab. Select the far right option – most likely next to the mute button – and the Quest 2 will show you exactly what to say.
Upgrade your head strap
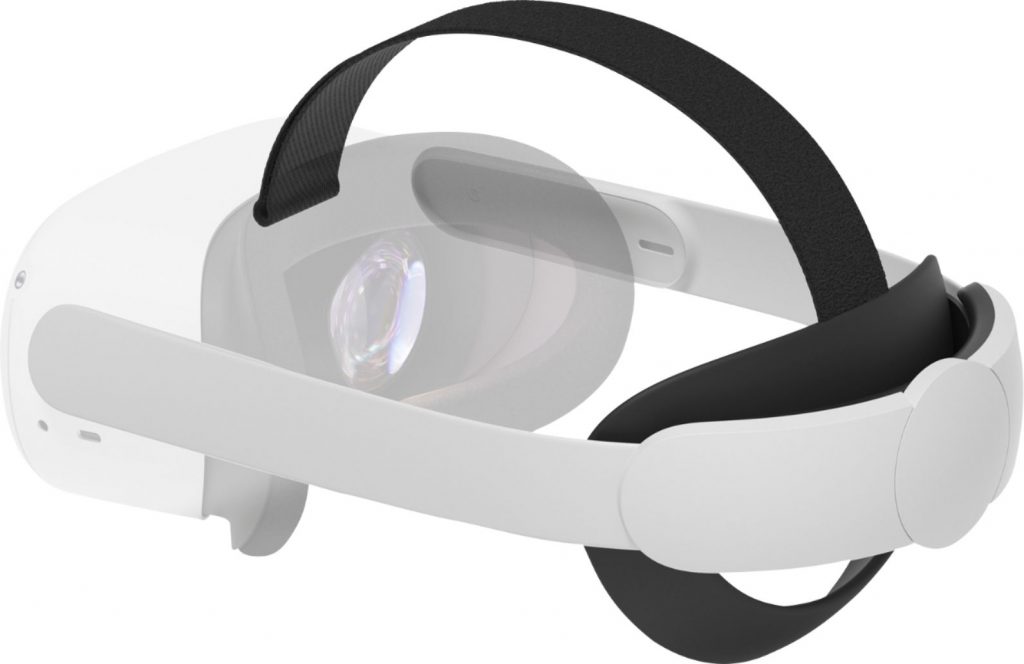
Let’s face it – if you’re dropping the cash for the Oculus Quest 2, you probably plan to use it quite a bit. Therefore, you’ll probably want to upgrade your head strap from the get-go. Oculus offers two options, the Quest Elite Strap and the Elite Battery Strap, and both are better than the standard option.
The soft, basic strap might work for comfort, but it doesn’t do much to counteract the weight of the headset. Both the Elite Strap and the Elite Battery Strap offer proper counterweights to the headset, and the Elite Battery can keep you in the game a bit longer.
Protect your lenses from direct sunlight
This tip is a bit more obvious if the Quest 2 isn’t your first VR experience, but don’t let sunlight into your lenses for a long period of time. The lenses can focus the light and fry a hole straight through your expensive display – much like burning a leaf with a magnifying glass.
It’s long been a problem with VR headsets, so you may want to set ground rules if others are using your Quest 2. For example, don’t leave the lenses facing sunny windows, or make sure to stow the headset in a drawer or closet when you’re done.
Double-check those privacy settings

Privacy is often the best policy, so it’s important to remember that you have to sign in to your Quest 2 with a Facebook account before you can use it. While we all totally trust Facebook to be upstanding, you might want to review your settings in the Oculus Privacy Center. Three settings you can control include:
- Who will see your activity on Oculus?
- Who can see your friends list on Oculus?
- Who will see your Facebook name on Oculus?
If you want to keep your information well out of sight, just set all three to Only Me. You can also check out what data Facebook is collecting in the View Your Information section of the Privacy Center.
Record and stream your VR gameplay
With something as cool as VR, it’s unfortunate that you can’t let friends and family enjoy it at the same time. You can always pass the headset around, but the Oculus Quest 2 makes it easier with recording and streaming functions. It takes seconds to go live or to capture stills and video, and it all starts with the Oculus button on your controller. Once there, you can head to the share tab and choose from Record Video, Take Photo, Cast, or Go Live options.
As if you’d forgotten about Facebook’s involvement, you can only stream to Facebook with the Go Live option. It’s not a dealbreaker, but it might not be convenient if you prefer other streaming platforms.
Set up your passthrough
Our last tip for the Oculus Quest 2 is to set up a passthrough. This essentially tells your headset to use the camera array to show you the space around you instead of transforming it into a fantasy world. While it may be cool to transport yourself to a spaceship on your first setup, it can cause problems if you’re searching for a controller or trying to maneuver through your house.
As usual, you’ll use the Oculus button on your controller to open the menu and head to settings. Next, head down to the Virtual Environment option, which sits just above the Experimental Features menu. Finally, choose Passthrough as your preferred option or opt for a virtual background if you so desire.
That does it for our top Oculus Quest 2 tips and tricks. Hopefully, you learned something as you navigate your new headset, and we’ll be sure to bring you more tips in the future.